Thursday, April 14, 2011

Howto Connect NetApp iSCSI to XenServer 5.6 FP1


Since iSCSI is a great choice as a SR for your XenServer, in terms of performance and scalability, I've decided to created a straight forward and easy to understand guide of how to connect NetApp iSCSI based storage to XenServer, read on...
On the NetApp side:
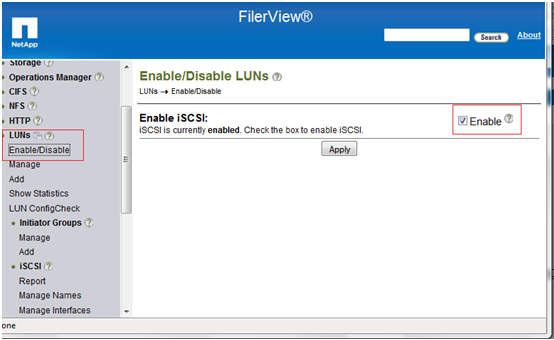
1) Enable iSCSI service on the filer:


2) Create the desired LUN:
·        


3) Dedicate a separate NIC for iSCSI traffic, be sure the filer iSCSI dedicated NIC is assigned with a proper IP address:

·        


4)From the XenServer copy it's iscsi FQN:


5)Add the new initiator:


6)Map the new LUN to the new initiator:


On the XenServer side:
1)      Be sure you have a NIC assigned to iSCSI traffic.


2)      Right click on the XenServer -> New storage-> Software iSCSI


Click on Discover IQNs, it should find the NetApp IQN.
Next, click on Discover LUN's, it should find the available LUN's.

Click "Finish" to attach the SR.

Your newly created LUN should be successfully attached to XenServer at this point.


Wednesday, April 6, 2011

Howto rescan NICs on XenServer

1. First list the physical NIC's:
#xe pif-list

2. After making a note of the information, run the following command for each one of the new NIC's that appear as disconnected:
#xe pif-forget uuid=UUID


3. Next, have the system scan for the correct uuids, you will need the uuid of your server (find it with "xe host-list" ):
#xe pif-scan host-uuid=UUID

4. List the NICs again to see what we have found:
#xe pif-list

5. You should see the correct UUID's of your NICs. 
Then, run the following command for each one of the new NIC's to add them back:
#xe pif-plug UUID

At this point your new NICs should appear as connected.

Sunday, April 3, 2011

Howto Backup VM's in XenServer

I found this technique to be the easiest and most efficient, importing the whole virtual machine to *xva file. Though it's not the quickest method it worked flawlessly for me.

1. At XenServer console as root, mount some SR (CIFS or NFS) to a folder:
#mount -t cifs //myfiler01/ntfs_share /backup/

2. Check the mount:
#mount |grep backup

3. To find the VM you want to export Run:
#xe vm-list


4. Run the export VM command:
#xe vm-export vm=centos5 filename=/backup/centos5_backup.xva

That's it, the VM exported as *.xva file which is easy to import in case of failure. 

In case you want to import the VM, run:

#xe vm-import vm=centos5 filename=/backup/centos5_backup.xva